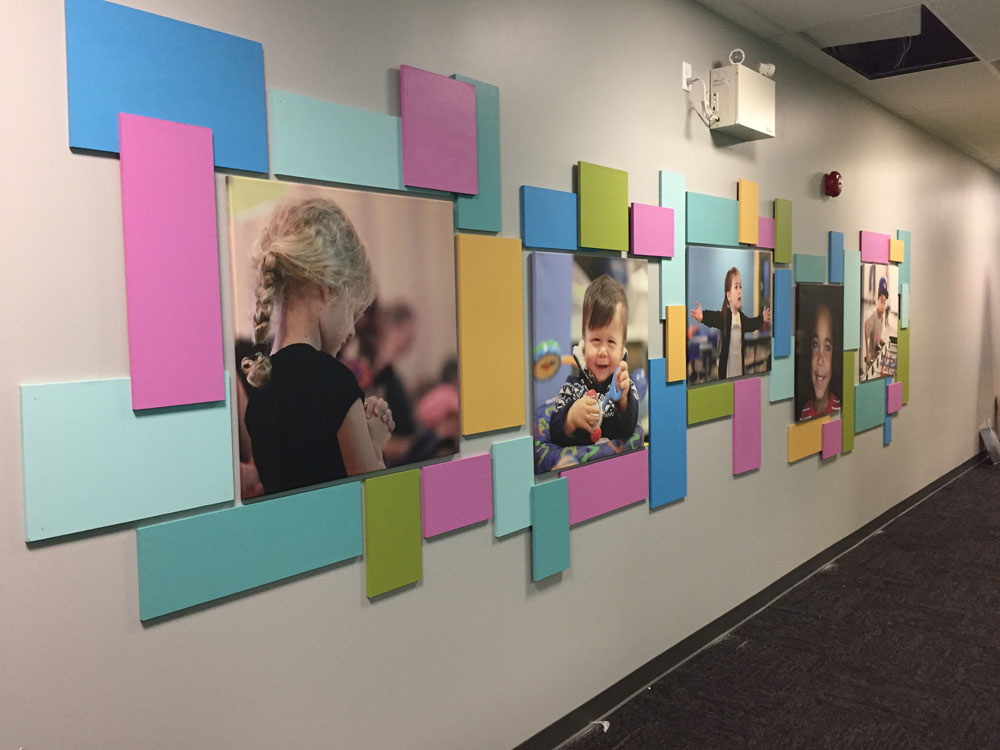
We are just getting ready to launch a new campus. We have a smaller space available for our kids ministry rooms, but we still wanted to make it fun and kid friendly. So, we decided to make a photo wall down our kids hallway. The idea can from a photo I saw on worshipfacilities.com . Here’s what we did to make it.
Step 1. We took pics of some kids in our kids ministry. We tried to get close up shots of kids faces and them in action. I contacted the parents of each child to get permission to print and display their child’s photo. Then I ordered photos to be printed on canvas. These pics are 30″ x 30″ and were aprox. $75 each. Bestcanvas.ca was where we ordered them from. They had the best prices I could find online, and the quality was great! No taxes, duty or shipping cost (on orders over $150). I searched for a coupon code so that saved us extra money as well. They shipped within 24 hours and arrived in just a few days. Talk about fast turn around!
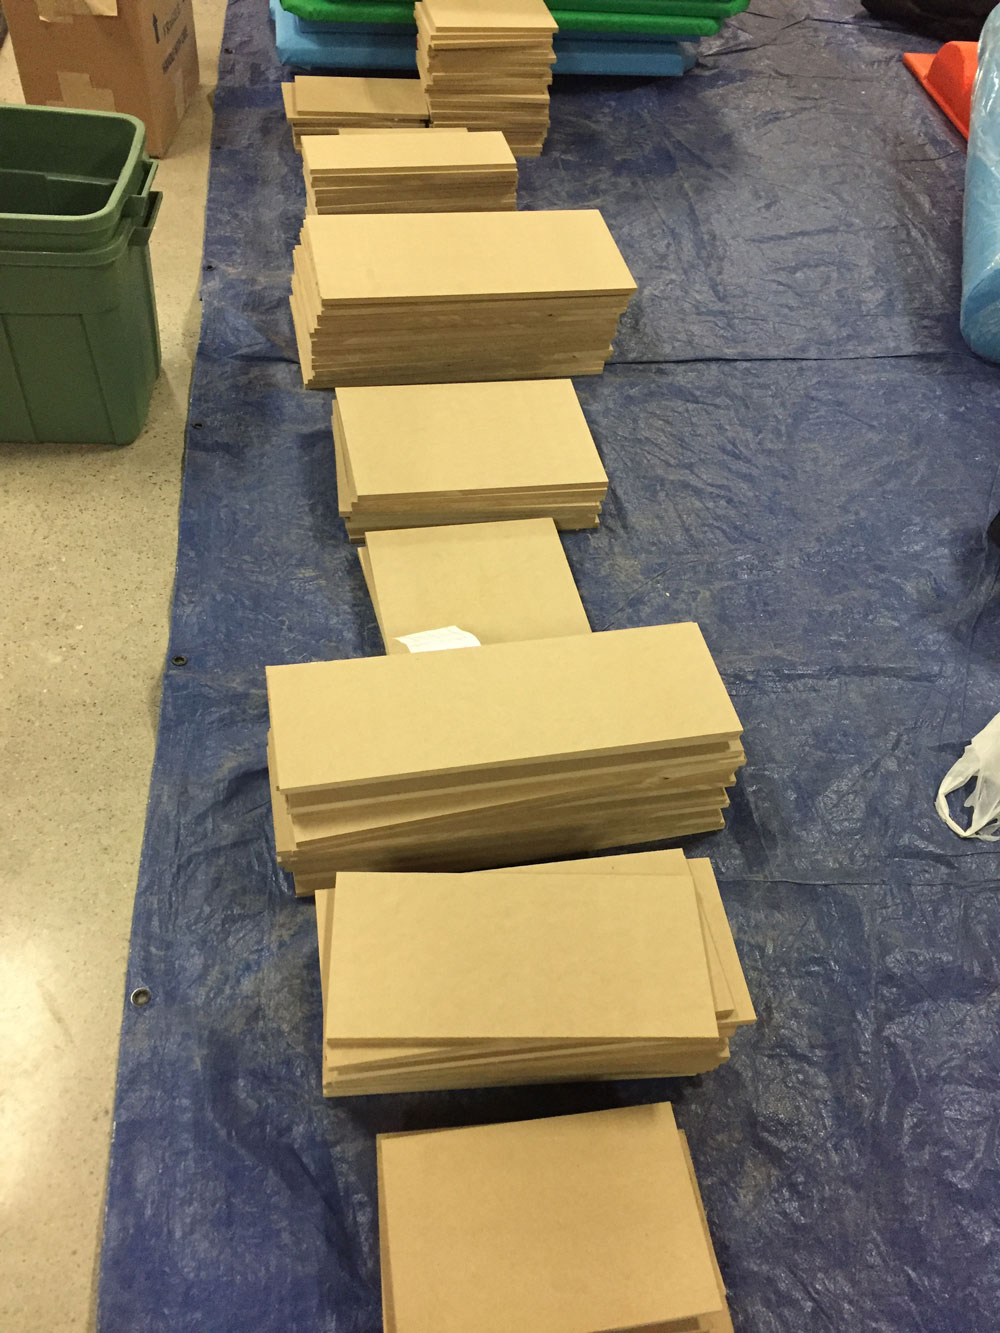
Step 2. I asked some handymen to cut me some rectangles from 1/2 inch 4×8 MDF board. I took a piece of paper 4inchs by 8 inches and drew out how many rectangles could fit on one board in various sizes.
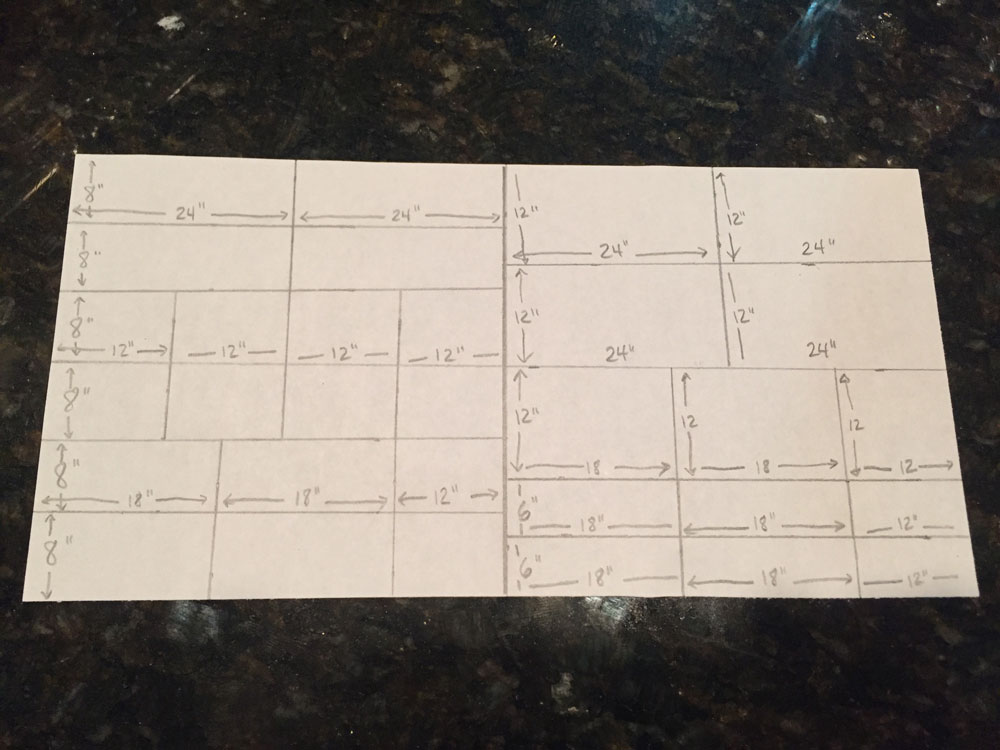
This is what they looked like when they were all cut out. We used 4 sheets of MDF board, but we probably only needed 2 or 3. We had a lot left over.
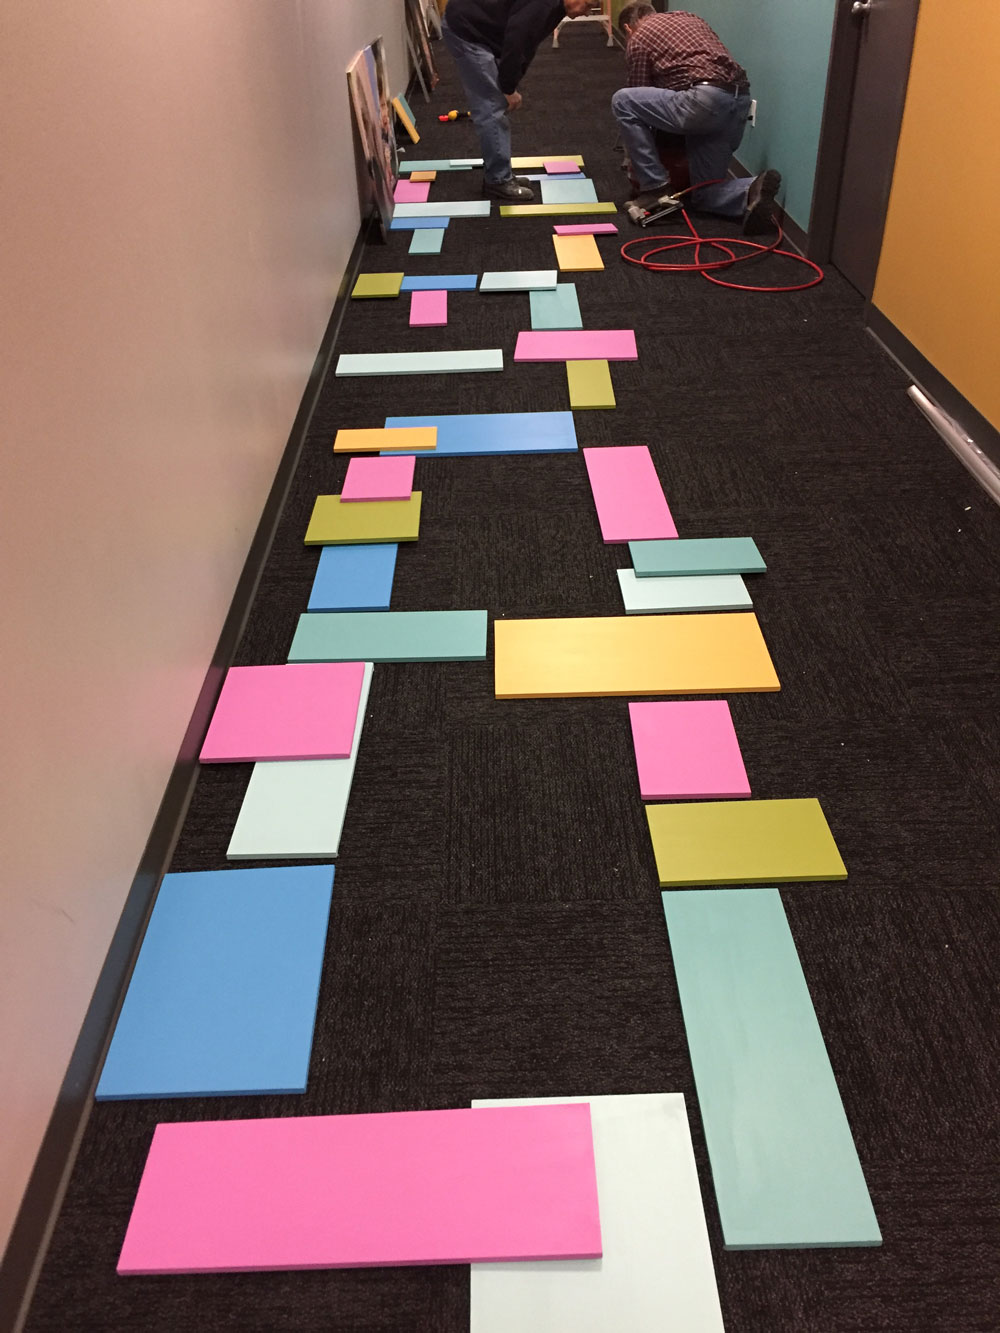
Step 3. I took the pieces of wood and set them out on the floor as I ‘freestyled’ the design. I left spaces that were 32 x 32 inches (or the dimensions of the photos with a little space around) so that the pics would fit in the design.

Step 4. I took a panoramic photo of the design so I would remember how to put it together later. We used 6 colours of paint. (They were the same colours used in our kids rooms.) I dabbed my finger in a bit of paint and smeared it on each board so I would know what colour to paint each board. We only painted the boards needed for the design and not the extras. Each board got 2 coats of paint. I printed the panoramic photo on 11×17 paper, and took a q-tip and dabbed the colours on the printed version so that I would remember what colours went where. We let the paint dry and transported everything to the location where it was to be installed.
Step 5. I set out the pieces on the floor in the hall where we were putting the photo wall. I used the 11×17 panoramic map to help me figure out where the pieces went.
Step 6. My handymen helped me put the pieces up on the wall. We found the center of the wall and hung the center photo up first. Then we placed the coloured rectangles around the photo according to the panoramic map that I printed on 11×17 paper. The rectangles were hung by using a nail gun & nails. We worked our way out from the center doing one side then the other.
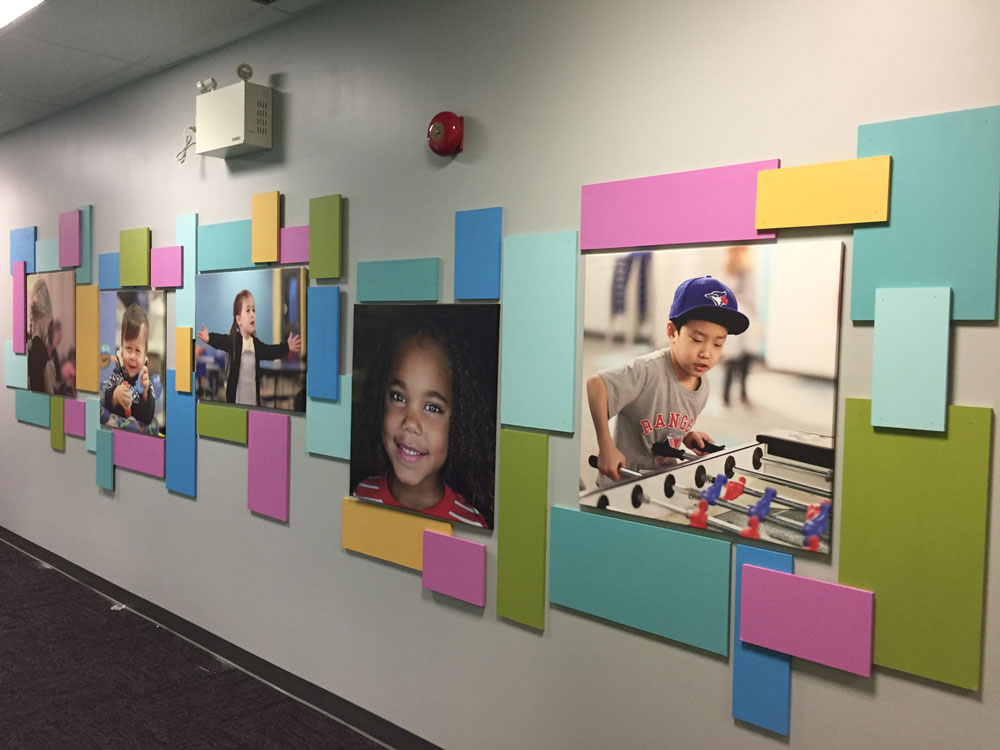
Step 7. The final touch is to fill in the tiny holes left from the nails & paint over them.
We love that the pictures are of kids from our church and they are creatively displayed!